Engraving jewelry is a beautiful way to add a personal touch, making each piece unique and meaningful. Learning how to engrave jewelry allows you to create customized designs, from initials to special dates, right at home. With just a few tools and simple techniques, anyone can add professional-looking details to jewelry. Engraving isn’t just for experts; it’s a skill anyone can try. In this guide, you’ll find easy steps for engraving jewelry, from picking the right tools to mastering basic techniques. Start personalizing jewelry pieces that tell your story!
Different Engraving Techniques
Jewelry engraving offers various techniques, each adding a unique style and character to a piece. From traditional hand engraving to precise laser etching, each method serves different design needs, materials, and detail levels.
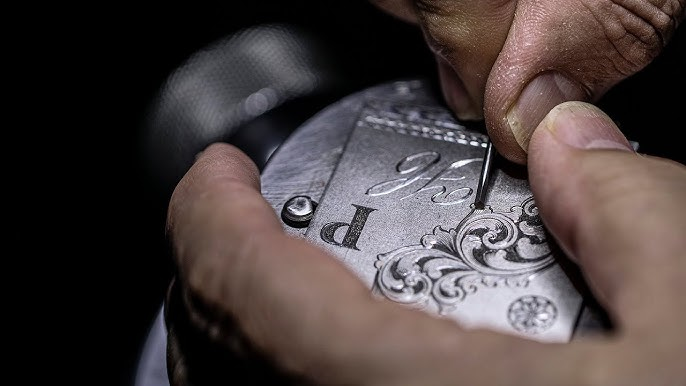
Hand Engraving
Hand engraving is a traditional technique where a skilled artisan uses a burin, a small chisel, to carve designs by hand. This method offers a deep, artisanal quality that is highly valued for custom or one-of-a-kind pieces. Though labor-intensive and requiring skill, hand engraving adds a unique, personalized touch to jewelry.
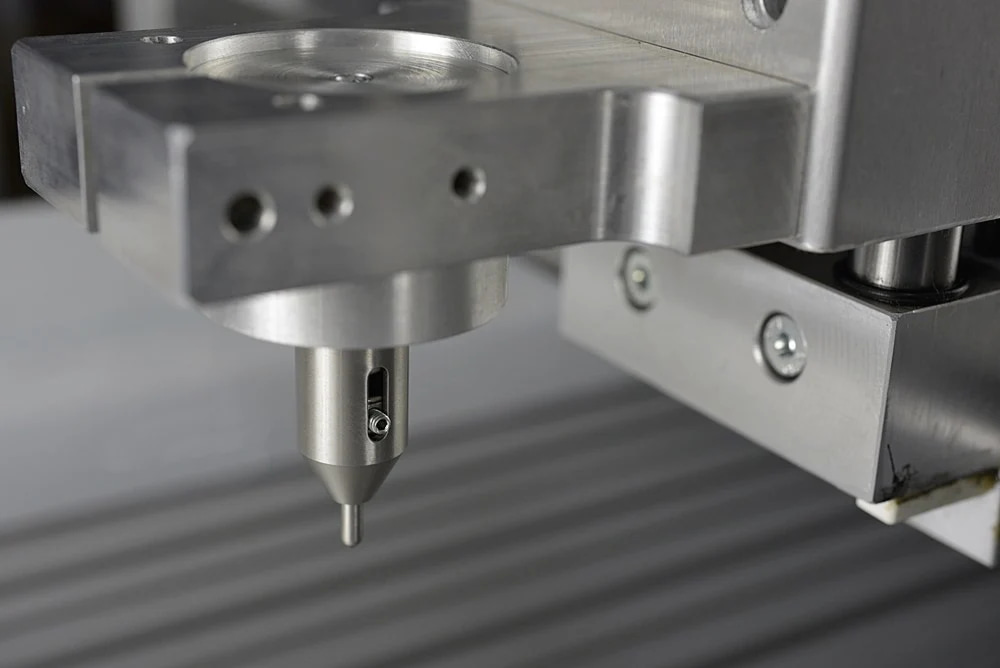
Machine Engraving
Machine engraving utilizes specialized equipment with rotating drills or cutters to imprint designs onto jewelry. This method strikes an ideal balance between accuracy and speed, making it well-suited for high-volume production needs. It is particularly effective for designs that range from simple to moderately intricate and can be applied to materials such as metal, plastic, and some types of stones.
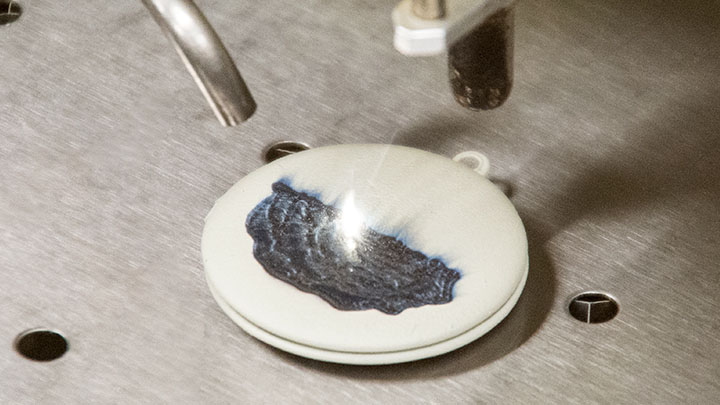
Laser Engraving
Laser engraving uses a high-powered laser beam to etch designs with precision. It’s programmable, allowing for detailed and intricate patterns with control over the depth and width of the engraving. Suitable for nearly any material, laser engraving doesn’t require replacements like rotary bits, making it efficient for long-term use. This technique is preferred for delicate items or highly detailed designs, especially on metals and stones.
Jewelry Engraving Tools
Engraving jewelry requires specific tools to achieve clean and professional results. Here’s a breakdown to help you choose the right equipment for how to make engraved jewelry.
Hand Engraving Tools
This method requires tools that offer control and allow for detailed, intricate designs on metal surfaces.
Laser Engraving Tools
It uses a laser beam to etch designs and requires specialized equipment to handle complex patterns on a variety of materials.
Step-by-Step Guide To Engraving Jewelry
Engraving jewelry can seem daunting, but following a clear process can make it accessible, even for beginners. Here’s a step-by-step guide to get you started on how to engrave on jewelry with precision and confidence.
1. Choose Your Engraving Method
Determine whether you’ll use hand, rotary, or laser engraving based on the jewelry material, design detail, and your skill level. For delicate or intricate patterns, laser engraving is best; for a personal touch, hand engraving is ideal.
2. Gather Your Tools
Gather the essential tools based on your chosen engraving method. Using the right tools enhances precision and ensures quality results in your work. For more details, refer to the section above.
3. Prepare the Jewelry Surface
Clean the jewelry thoroughly to remove any oils, dust, or debris. For best results, ensure the surface is smooth and dry. A clean surface prevents interference and helps your engraving tool move smoothly.
4. Secure the Jewelry in Place
Use an engraving block or vise to secure your piece firmly. This prevents movement and allows you to apply steady, controlled pressure without the jewelry shifting mid-engrave.
5. Design and Transfer Your Pattern
Sketch your design on paper first, then lightly outline it on the jewelry with a pencil or marker. For laser or CNC engraving, create your design in a software program and upload it to the engraving machine.
6. Start Engraving Slowly
Begin by lightly etching the outline of your design to avoid mistakes. If you’re using a rotary tool or hand engraving, start with shallow cuts, gradually deepening them for clarity and depth. For laser engraving, adjust the settings to match your material and design depth requirements.
7. Check Progress and Adjust
Regularly check your engraving progress to ensure accuracy and make any adjustments as needed. This step helps prevent errors and allows you to see how the design is shaping up.
8. Clean and Polish the Engraving
Once you’ve completed the engraving, clean the jewelry to remove any metal dust or residue. For metal jewelry engravings, use a polishing cloth to highlight the details and give the piece a smooth finish.
Conclusion
Engraving jewelry is a skillful way to add a unique, personal touch to any piece. With the right tools and techniques, the engraving process can be accessible and rewarding, whether you’re creating custom designs for yourself or others. By following a step-by-step approach, you can achieve professional-looking results on metal, stones, or other materials. With practice and attention to detail, you’ll soon master how to engrave jewelry beautifully and confidently.