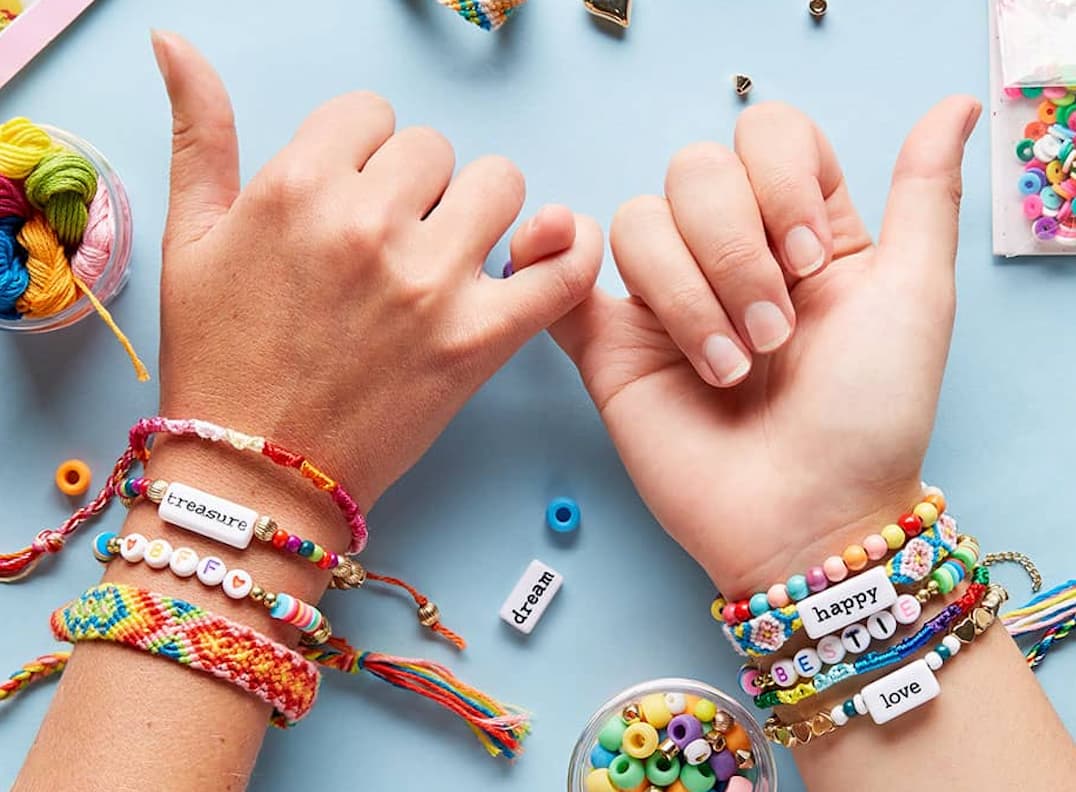
Friendship bracelets are more than just a fun craft project—they're a symbol of affection that can carry significant meaning between friends. Adding letter beads to these creations adds a personal touch, allowing you to spell out your names and initials or convey heartfelt messages.
If you're wondering how to make a friendship bracelet with letter beads, you've come to the right place. In this guide, we'll walk you through the materials needed and provide step-by-step instructions to help you craft a unique, meaningful bracelet that you and your friends will treasure.
Materials Needed for a Friendship Bracelet with Letter Beads
Before we dive into the steps on how to make bracelets with letter beads and string, it's essential to gather all the materials. Here's what you'll need to start making your own easy friendship bracelets with beads:
Letter Beads
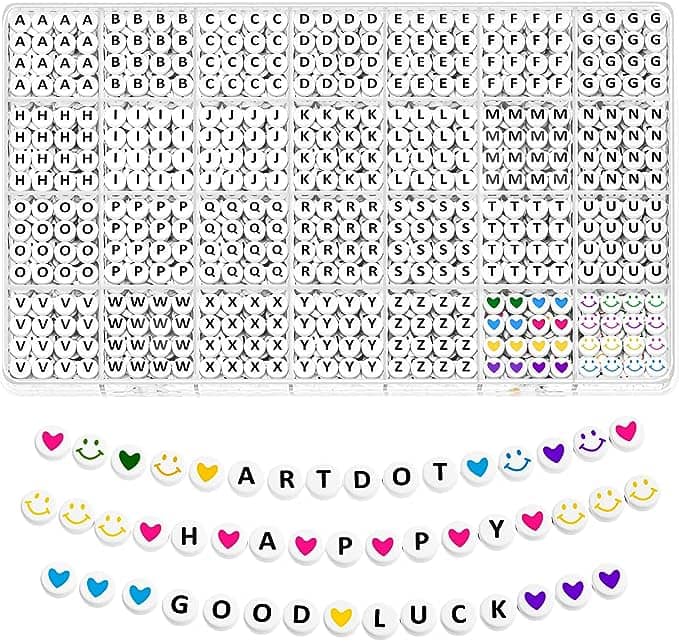
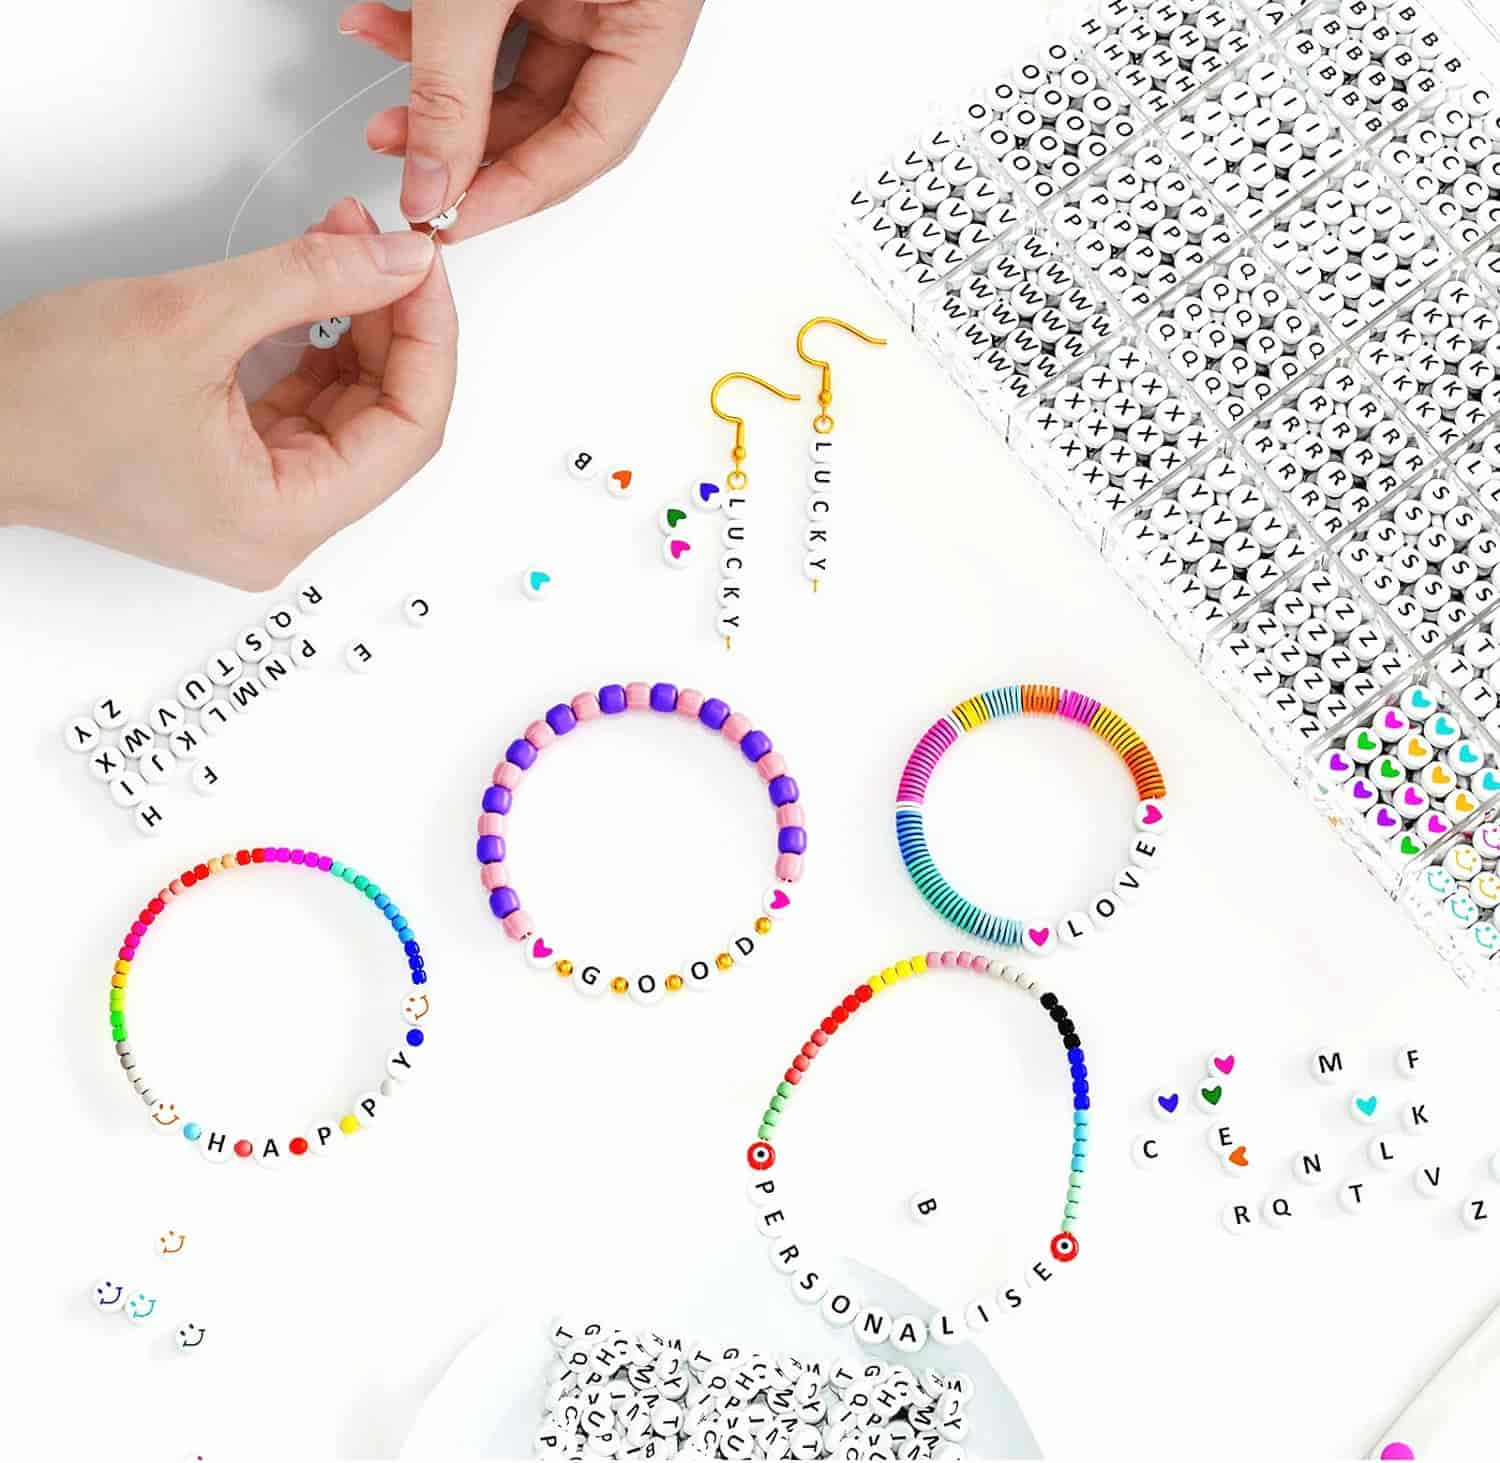
The most crucial component for your bracelet is, of course, the letter beads. These beads come in various styles and colors, allowing you to spell out names, initials, or special messages. When choosing letter beads, consider the size and hole diameter to ensure they fit comfortably on the string or cord you plan to use.
For those looking for a good set of letter beads, the ARTDOT Letter Beads are a great choice. This set comes with a storage box that contains a total of 1,400 4 x 7 mm beads, each with a 1mm hole, including 50 black letter white beads of each letter, 50 smiley face beads, and 50 heart beads.
These beads are made from high-quality acrylic using advanced spray and grinding technology, ensuring smooth sides and clear patterns. The holes are perfectly sized for flawless handmade work. Plus, the beads are methodically sorted in the storage box, making it easy to find the letters you need without wasting time searching.
Decorative Beads
In addition to letter beads, you might want to include decorative beads to enhance the design. These can be of various shapes, sizes, and colors.
String or Cord
The choice of string or cord can vary depending on the style and durability you desire. Options include embroidery floss, waxed cotton cords, and nylon threads. Embroidery floss is often recommended due to its strength and vibrant colors. Select your friend's favorite colors or a palette that complements the letter beads.
Clasps or Ties
To secure your bracelet, you'll need either clasps or extra string for ties. Clasps provide a more finished look, while simple knot ties offer an easy and adjustable closure.
Scissors
A good pair of scissors is necessary for cutting your string or cord to the desired length.
Tape or Clipboard
To keep your bracelet stable while weaving, use tape to anchor it to a flat surface or a clipboard to hold it in place. This is especially helpful when you're working on complex patterns.
Ruler or Measuring Tape
To measure your string or cord accurately, a ruler or measuring tape will ensure that your bracelet fits perfectly.
How to Make a Friendship Bracelet with Letter Beads?
Creating a friendship bracelet with letter beads is a fantastic way to craft a personalized gift that carries a special meaning. Here's how to make a letter bead bracelet:
1.Plan Your Design: Before you begin to make friendship bracelets with alphabet beads, think about the message or name you want to include in your bracelet. This will determine the number of letter beads you need. Sketch out the layout on paper or arrange the beads on a bead mat to visualize the final design. Consider incorporating decorative beads before, after, or between the letter beads to enhance the overall look.
2.Measure and Cut the Cord: Measure the length of embroidery floss or cord you need. For an average-sized bracelet of a simple three-strand braid, cut three strands of floss, each about 24 inches long. You can always trim the excess later.
3.Secure Your Working Surface: Tape the ends of the floss to a table or secure them with a clipboard to keep the bracelet stable while you work.
4.Knot the Base: Tie a knot at one end, leaving a 2-3 inch tail for the clasp or adjustable knot later. Alternatively, you can tie a loop instead of a knot if you plan to use a button as the clasp.
5.Begin Braiding: Choose your preferred braiding style (e.g., simple three-strand braid, macrame, or chevron pattern). Create the base for the bracelet by braiding about 1-2 inches. This portion will wrap around the back of your wrist, allowing the beads to sit on top.
6.Add the Letter Beads: Once you have a few inches of braided bracelet, start to add letter beads to friendship bracelet. Spell out a name, initial, or a special word. Slide the first bead onto the middle strand (if you're using three strands). Add decorative beads before and after the letter beads to enhance the design. This is where you can be creative with the pattern and color scheme. (Want to learn how to read friendship patterns?)
7.Continue Braiding: After positioning the letter beads, continue braiding until you reach your desired bracelet length.
8.Finish the Bracelet: Once the bracelet is long enough, tie a knot to secure the braid. Add a clasp or button if you used a loop at the start. For an adjustable knot, tie sliding knots using the leftover tail ends.
9.Trim Excess Cord and Secure: Trim any excess cord or floss, leaving a neat finish. Optionally, add a drop of glue to the final knots for extra security.
Conclusion
Creating friendship bracelets with letter beads allows you to express your creativity while strengthening the bonds you share with friends. By following this guide on how to make a friendship bracelet with letter beads, you've learned not only the materials and techniques but also how to personalize your bracelet with initials, names, or meaningful words. Whether it's for a special occasion or just because, this personalized gift will be a cherished reminder of the friendship it represents. So, gather your materials, unleash your creativity, and start making bracelets that will brighten your friends' days!