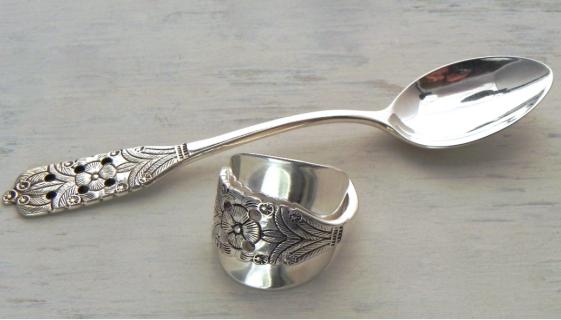
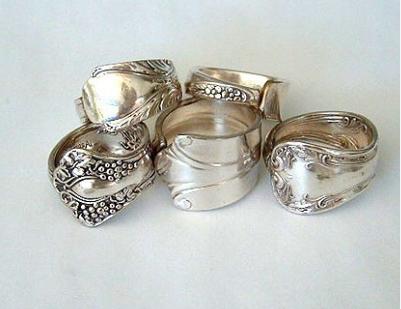
Creating a spoon ring is a delightful way to change vintage flatware into a stylish piece of jewelry. By repurposing a spoon into a ring, you create something both meaningful and fashionable. But how do you make spoon rings? This DIY project is not only eco-friendly but also takes you to craft a personalized accessory or a thoughtful gift.
In this guide, we'll walk you through the essential steps of how to make a spoon ring. From the materials and tools needed for this project to each phase of the bending and polishing process, we’ve got you covered. Let's get started on transforming an ordinary spoon into a unique ring!
Materials and Tools Needed
Before delving into the steps of how to make a ring out of a silver spoon, you’ll need a few specific materials and tools. Here's what to gather before you start:
Spoon: Choose a spoon that is made of sterling silver or stainless steel for the best malleability and finish. Vintage spoons often have unique designs that make for beautiful rings.
Polishing Cloth: To give your finished ring a shine.
Ring Mandrel: Essential for shaping and sizing your ring.
Metal Files: Used to smooth any rough edges after cutting.
Jeweler’s Saw or a Strong Pair of Wire Cutters: To remove the handle of the spoon.
Hammer: For bending the spoon into shape.
Heat Source (optional): A small butane torch or even a stovetop can be used to soften the metal, making it easier to work with.
In addition to preparing the items above, make sure that you have a clean workspace and all your materials and tools laid out for easy access. Safety glasses are also recommended to protect your eyes during cutting and shaping.
How to Make a Spoon Ring? Step-by-Step
With the essential materials and tools laid out, it is time to embark on our project of transforming a simple piece of flatware into a stylish piece of jewelry. Here’s a detailed, step-by-step guide on how to make a ring from a spoon:
Step 1: Preparing the Spoon
Using a jeweler's saw or a strong pair of wire cutters, cut the handle from the bowl of the spoon. You only need the handle to make the ring, so the length of the handle will determine the size of the ring. A general guide is to measure the circumference of your finger and add about a half-inch to this measurement for the length of the spoon handle you’ll need.
Step 2: Smoothing Edges
Once the spoon handle is cut to length, use metal files to smooth all cut edges. This prevents any sharp edges from hurting you as you wear the ring. Pay particular attention to the ends of the spoon handle, rounding them slightly for a comfortable fit.
Step 3: Shaping the Ring
Place the spoon handle on a ring mandrel. Starting from the marked size of your finger, begin to gently hammer the spoon handle around the mandrel. If the metal is too hard, you can heat it with a small torch or on a stovetop to soften it, making it easier to bend. Work slowly and adjust the placement to ensure the ring forms evenly.
Step 4: Fine-Tuning the Fit
Once you have the basic ring shape, you can remove it from the mandrel and make any minor adjustments by hand or with pliers. Try on the ring and ensure it fits your finger comfortably. If adjustments are needed, reposition it on the mandrel and use the hammer to make corrections.
Step 5: Polishing the Ring
When you are satisfied with the shape and fit, it’s time to polish the ring. Use a polishing cloth to buff the surface of the spoon handle. For a more thorough polish, you can use a jeweler’s rouge or a non-abrasive metal polish. This step will enhance the shine of the metal and highlight any unique patterns or engravings on the spoon’s handle.
Step 6: Final Adjustments
After polishing, you may find that further minor adjustments are needed to perfect the fit or appearance of your ring. This is normal as the polishing process can sometimes slightly alter the shape of the metal. Make these adjustments carefully to avoid scratching the newly polished surface.
Step 7: Sealing the Metal (Optional)
If you want to protect the finish of your ring and prevent oxidation, especially if using sterling silver, you can apply a clear metal lacquer. This step is optional but can prolong the shine and appearance of your ring.
Conclusion
Now you know how to make a spoon ring. As we have discovered, crafting a spoon ring is a surprisingly straightforward process that combines creativity with practical craftsmanship. By diligently following the detailed steps outlined above, you not only create a piece of jewelry that rivals those found in stores but also imbue it with personal significance and style. So, gather your tools, select your spoon, and start the rewarding journey of crafting your very own spoon ring today.