Have you ever thought about making your own DIY earrings? It's a great way to show off your unique style and create something that's truly one-of-a-kind. Not only is it a fun hobby, but it can also turn into a successful business. In this article, we'll walk you through everything you need to know about how to make earrings, from the tools and materials you'll need to get started to different techniques for making beaded, hoop, and boho-style earrings. Whether you're a beginner or an experienced crafter, this guide has everything you need to create beautiful and stylish earrings that you'll be proud to wear or sell. Let's get started and see where your creativity takes you!
What Do I Need to Make Earrings?
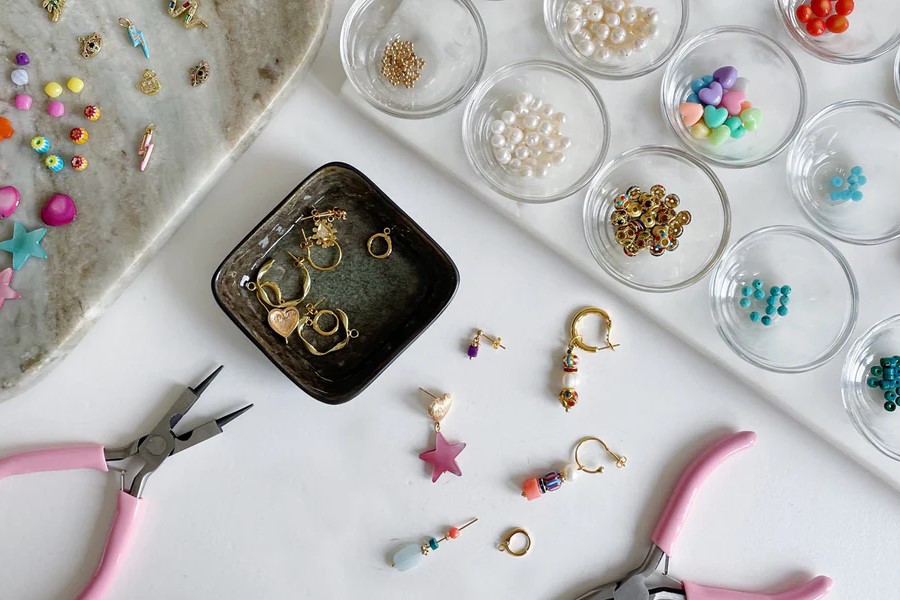
Let's start with how to make your own earrings! But first, here's a list of the basic materials and tools you'll need.
- Beads – Choose from glass, wood, metal, or semi-precious stone beads based on the style you aim for in making earrings.
- Wire – For beading and creating custom shapes, including hoop earrings. Opt for jewelry wire in a gauge that's easy to work with yet sturdy (20-24 gauge is versatile).
- Jump Rings – Small metal rings that help attach your earring components together.
- Pliers – Round-nose and flat-nose pliers, as well as wire cutters, are essential tools for bending wire, opening and closing jump rings, and cutting the wire.
- Ear Wires – For hoops and other dangling earrings, ear wires are a must-have. They can also come in various finishes, like hooks that will make earrings look more appealing.
- Earring Hooks – Choose from French hooks, lever backs, or hoops, depending on your preferred style. They also come in various finishes, including gold, silver, and bronze, to match your unique taste.
Looking for comfortable and hypo-allergenic earring hooks? Check out the Huucky 925 Sterling Silver Earring Hooks! Made of 925 silver-plated copper, these hooks come with clear silicone backs and are perfect for jewelry DIY projects.
Basic Earring-making Techniques for Beginners
To make a pair of perfect earrings, mastering a few basic techniques is a great starting point. Here are some foundational skills to develop:
- Opening and Closing Jump Rings: Always twist jump rings open, rather than pulling them apart, to maintain their shape. Use two pairs of pliers for best control.
- Creating Wire Loops: Wire loops are essential for attaching components. Practice making uniform loops with round-nose pliers for a professional look.
- Using Crimp Beads: Crimp beads are used to secure the ends of beading wire. Use crimping pliers to secure them properly without damaging the wire.
- Attaching Earring Hooks: Open the loop on the dangle earring hook, attach your earring piece, and close securely. Ensure the earring faces forward.
- Selecting Materials: Understanding the materials (beads, wires, hooks) and how they work together is fundamental. Choose quality materials for durable earrings.
How to Make Beaded Earrings?
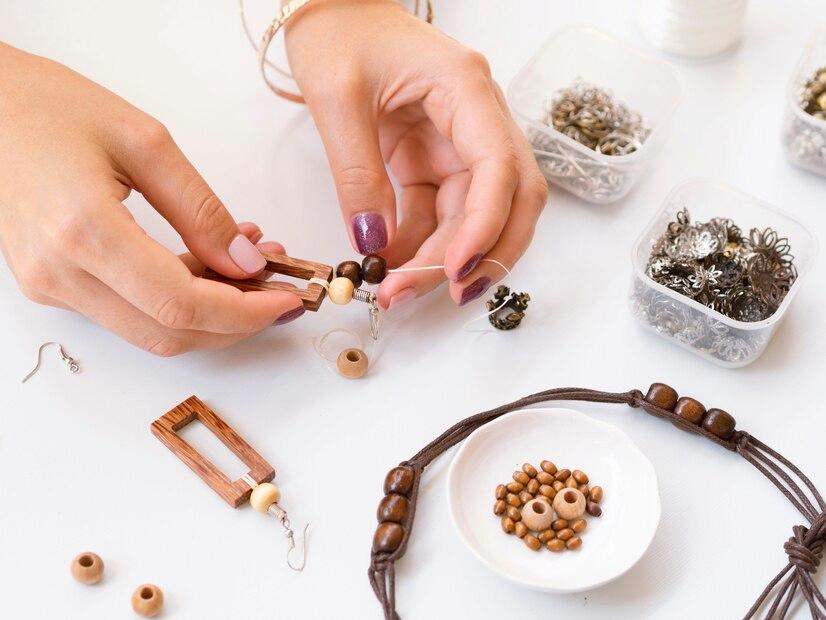
Having collected all the necessary tools and materials and mastered basic earring-making skills, it’s time to make earrings by yourself. Let’s start with creating your own beaded earrings, which can be a satisfying craft that results in lovely, personalized jewelry. Follow this step-by-step guide on how to make earrings at home:
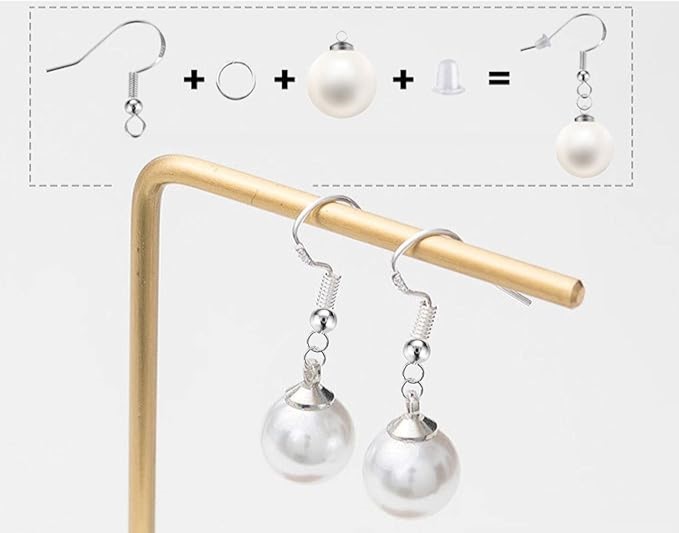
Step 1: String the Beads
Slide your chosen beads onto an endpin. Begin with a small spacer bead then add others to form a pattern. Leave about 1/4" to 3/8" (6mm to 1cm) of wire exposed at the top.
Step 2: Create a Loop
With the round-nose pliers, bend the top of the endpin at a 90-degree angle just above the beads. Then, curl the wire into a loop. Snip away any excess wire.
Step 3: Attach Earring Hook
Hook the ear wire onto the loop before fully closing it. Securely close the loop with your pliers to keep everything in place.
Step 4: Repeat for Pair
Mirror these steps to make the second earring, ensuring symmetry for a matching pair.
Step 5: Customize
For a unique touch, consider adding a statement bead or pendant, using wire wrapping techniques, or exploring different earring bases, like fishing line or hoops. View the detailed guide on making bead earrings.
How to Make Hoop Earrings?
Do you want to know how to create earrings with hoops? Here's an easy yet exciting process that you can follow:
Step 1: Outline Your Hoop Size
Select a cylindrical tool like a ring mandrel or dowel, and tightly wrap your 20-gauge wire around it to outline the hoop size.
Step 2: Cut Your Wire
Once happy with the hoop size, remove the wire from the cylindrical object and cut away the excess with flush cutters. Ensure to keep an overlap of about 2cm for the fastening.
Step 3: Create Your Hoop Fastening
Use round nose pliers to grip one wire end and wrap it around the pliers to create a small loop. Then, bend the other wire end into an upwards "L" shape using chain nose pliers—this will be the fastening.
Step 4: Hammer the Wire
Gently hammer the wire with a chasing hammer to flatten it slightly, keeping the fastening intact. This step strengthens the hoop and adds a finishing touch.
How to Make Boho Style Earrings?
How to create earrings in the boho style? Here's a simple step-by-step process:
Step 1: Forming the Loop
Hold the end of the wire using the round nose pliers at your desired loop diameter. Tiny loops form at the tip, larger ones towards the back.
Step 2: Adjusting the Loop
Once the loop is formed, it may appear uneven. Correct this by tweaking it backward with the pliers to achieve a perfect circle.
Step 3: Opening and Closing the Loop
Use chain nose pliers to gently open the loop sideways to add components. Close it by reversing the action, maintaining its shape.
Step 4: Adding Beads
Select your beads and thread them onto the wire. Create a 90-degree bend above the last bead.
Step 5: Finishing Loop
Leave about 3/8" of wire above your last bead. Curl this into a loop using the round nose pliers. This loop is less secure than a wrapped loop but suffices for earrings given they don't undergo much stress when worn.
Step 6: Final Touches
Now that your main component is ready, you can attach it to an earring hook of your choice, and your boho-style earrings are complete.
Advanced Earring Designs to Try
In addition to the DIY earring styles mentioned earlier, there are several sophisticated earring designs worth exploring.
1.Layered Earrings: Creating earrings with multiple layers adds depth and interest. Experiment with different materials and lengths for each layer.
2.Chandelier Earrings: These are intricate and involve multiple strands hanging from one or more layers. Precision in symmetry and balance is key.
3.Wire Sculpted Earrings: You can also try learning how to make earrings with wire. Just note that using wire to ‘draw’ or sculpt complex designs requires practice in shaping and securing the wire. These can be adorned with beads or gemstones.
4.Tassel Earrings: Knowing how to make earrings with thread is fun as well. Tassels can be made from thread, chain, or leather. They add movement and texture to earrings and can be customized in length and color.
5.Polymer Clay Earrings: Polymer clay can be molded into almost any shape and baked to set. This material allows for incredible creativity in both form and color.
Conclusion
Indeed, knowing how to make earrings is an exciting journey that offers endless possibilities for personal expression. With the right tools and smart techniques, you can transform this craft into a true art form that reflects your unique style. Whether you're a beginner or a seasoned pro, each pair you make will be a testament to your creativity and artistic vision!